Add Custom Attributes to Requirements
When you create a requirement set using Requirements Toolbox™, you can create custom attributes that apply to the requirements contained in the requirement set. Custom attributes extend the set of properties associated with your requirements.
Alternatively, you can customize your requirements by creating stereotypes that define custom requirement types and properties. For more information, see Define Custom Requirement and Link Types and Properties.
Define Custom Attributes for Requirement Sets
To define a custom attribute for a requirement set:
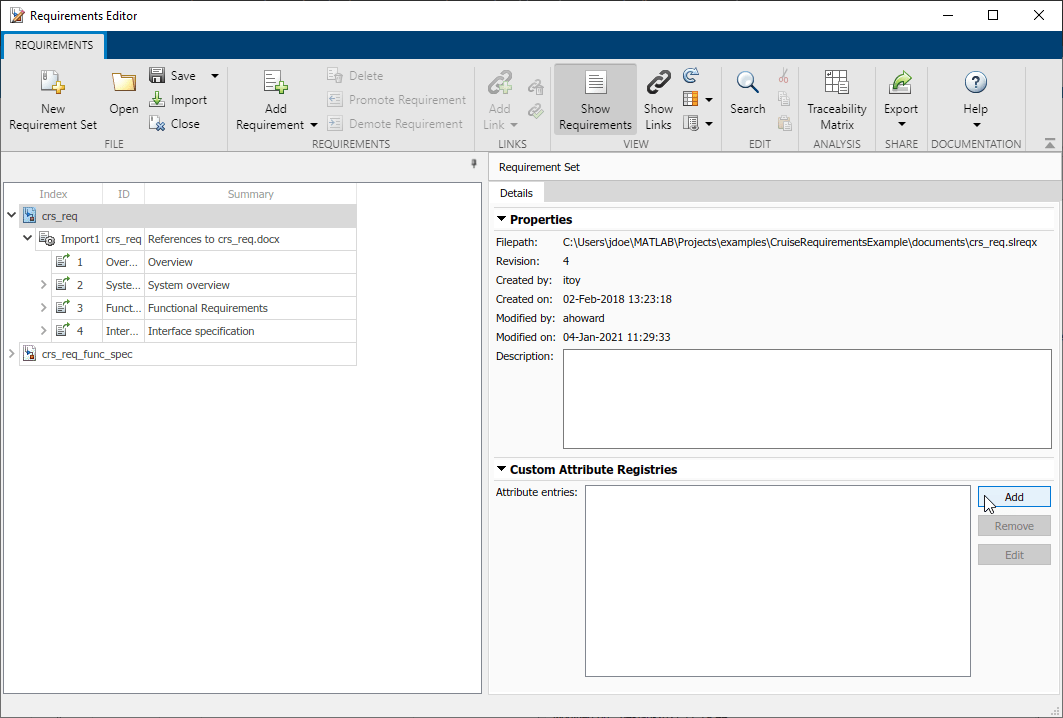
Open the Requirements Editor. At the MATLAB® command prompt, enter:
slreq.editor
Click Show Requirements.
Open an existing requirement set, or create a new one.
Select the requirement set.
In the right pane, under Custom Attribute Registries, click Add to add a custom attribute to the requirement set.
The Custom Attribute Registration dialog box appears. Enter the name of your custom attribute in the Name field. Select the type from the Type drop-down menu. Enter a description of the custom attribute in the Description field.
Alternatively, you can programmatically add a custom attribute to a
requirement set by using addAttribute.
Custom Attribute Types
There are four custom attribute types:
Edit: Text box that accepts a character array. There is no default value.Checkbox: Single check box that can be either checked or unchecked. The default value is unchecked.Combobox: Drop-down menu with user-defined options.Unsetis always the first option in the drop-down menu and the default attribute value.DateTime: Text box that only accepts adatetimearray. There is no default value. Seedatetimefor more information ondatetimearrays.
Set Custom Attribute Values for Requirements
After you define custom attributes for a requirement set, you can set the custom attribute value for each requirement. Select the requirement in the Requirements Editor. In the right pane, under Custom Attributes, enter the desired value in the field.
You can also set the custom attribute value for a requirement programmatically by using
setAttribute.
If you do not define a value for Checkbox or
Combobox type custom attributes for a requirement, the value will be set
to the default. For Checkbox custom attributes, the default value is
defined in the Custom Attribute Registries pane for the requirement set.
For Combobox custom attributes, the default value is
Unset.
Note
If you copy a requirement and paste it within the same requirement set, the copied requirement retains the same custom attribute values as the original. If the requirement is pasted into a different requirement set, the copied requirement does not retain the custom attribute values.
Edit Custom Attributes
After you define a custom attribute for a requirement set, you can make limited changes to the custom attribute. To make changes, select the requirement set in the Requirements Editor. In the right pane, under Custom Attribute Registries, select the custom attribute you want to edit and click Edit.
Note
You can only set the custom attribute value for one requirement at a time.
Alternatively, you can edit custom attributes programmatically by using updateAttribute.
For custom attributes of any type, you can edit the name
and description. For Combobox custom attributes, you can also edit the
value of each option in the drop-down menu, or add and remove options. If you remove an
option, the custom attribute value for requirements that previously had that value reset to
the default value, Unset. Editing the value of multiple options at once
resets the custom attribute values of that attribute for all
requirements in the requirement set. However, you can edit the value of a single option
without resetting the custom attribute values. Additionally, if you reorder the existing
options without changing the value of any of the options,
the requirements' custom attribute values do not reset.
After you set the custom attribute value for a requirement, you can change the value by selecting the requirement in the Requirements Editor and setting the updated value in the Custom Attributes pane.
Custom Attributes for Referenced Requirements
When importing requirements from an external file into Requirements Toolbox, if you select Allow updates from external source, the
requirements are imported as referenced requirements (slreq.Reference objects). For more information, see Select an Import Mode.
Referenced requirements are read-only by default. Although you can add custom attributes to a requirement set that includes referenced requirements, you must unlock the requirement to add a custom attribute value. Select the referenced requirement and, in the right pane, under Properties, click Unlock. Alternatively, you can unlock the referenced requirements by selecting the top import node and, in the right pane, under Requirement Interchange, clicking Unlock all.
Import Custom Attributes
When importing requirements from an external source, you can also import custom attributes that exist in the external source.
Import Custom Attributes from ReqIF
When importing requirements from a ReqIF™ file, you can map information to built-in properties and custom attributes. For more information, see Map ReqIF Types and Attributes.
Import Custom Attributes with Direct Import from IBM DOORS Next
When importing requirements using direct import from IBM® DOORS® Next®, custom attributes that are defined in DOORS Next are automatically imported to Requirements Toolbox. For information about importing requirements from IBM DOORS Next using direct import, see Link and Trace Requirements with IBM DOORS Next.
Import Custom Attributes from Microsoft Excel
When importing requirements from a Microsoft® Excel® file, you can map predefined headers or a row of cells to built-in properties and custom attributes. See Import Options for Microsoft Excel Spreadsheets.