Main Content

Load and Play ROS or ROS 2 Bag File

Load ROS or ROS 2 Bag File

Load the ROS or ROS 2 bag file by opening it from the File tab in ROS Data Analyzer app toolstrip. The toolstrip also contains the list of supported visualizers under the Visualize tab, and allows you to choose the layout between Default and Grid.

Grid Layout of ROS Bag Viewer App

You can open multiple instances of the app to play multiple ROS or ROS 2 bag files simultaneously.

View Bag File Details

The details of bag file content are found on the left side under the app toolstrip.

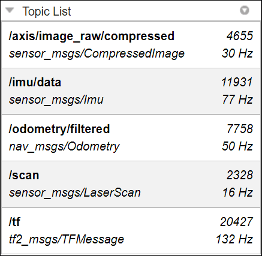
  • The Topic List shows the available topics in the ROS or ROS 2 bag file.

    Topic List of ROS Bag Viewer App

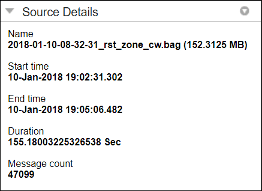
  • The Source Details list the Name, Start time, End time, Duration and Message count of the bag file.

    Source Details of ROS Bag Viewer App

Create Visualizers and Play Bag File

Types of Viewer

ViewerViewer IconInterfaceDescription
Image Viewer

Image Viewer Icon

Image viewer in ROS Bag Viewer App

  1. Load a bag file containing sensor_msgs/Image or sensor_msgs/CompressedImage message type.

  2. Select Image Viewer from the toolstrip and choose the data source from the drop down to visualize the image.

  3. Use the top-right corner options to zoom in and out, and pan the image in all directions.

Point Cloud Viewer

Point cloud Viewer Icon

Point Cloud Viewer in ROS Bag Viewer App

  1. Load a bag file containing sensor_msgs/PointCloud2 message type.

  2. Select Point Cloud Viewer from the toolstrip and choose the data source from the drop down to visualize the point cloud message.

  3. Use the top-right corner options to zoom in and out, pan, and rotate the message in 3D.

Laser Scan Viewer

Laser Scan Viewer Icon

Laser Scan Viewer of the ROS Bag Viewer App

  1. Load a bag file containing sensor_msgs/LaserScan message type.

  2. Select Laser Scan Viewer from the toolstrip and choose the data source from the drop down to visualize the laser scan message.

  3. Use the options on the top to zoom in and out, pan, and rotate the message 3D.

Odometry Viewer

Odometry Viewer Icon

Odometry Viewer of the ROS Bag Viewer App

  1. Load a bag file containing nav_msgs/Odometry message type.

  2. Select Odometry Viewer from the toolstrip and choose the data source from the drop down to visualize the odometry message.

  3. See the indicator to view the instantaneous location of the robot in the trajectory.

  4. Use the top-right corner options to zoom in and out, and pan in all directions.

XY Plot Viewer

XY Plot Viewer Icon

XY Plot Viewer of ROS BAG Viewer App

  1. Load a bag file containing geometry_msgs/Point or nav_msgs/Odometry message type.

  2. Select XY Plot Viewer from the toolstrip and choose the data source from the drop down to visualize how the numeric message field changes across the XY axes.

  3. See the indicator to view the instantaneous location of the robot across the XY axes.

  4. Use the top-right corner options to zoom in and out, and pan in all directions.

Time Plot Viewer

Time Plot Icon

Time Plot Viewer of ROS BAG Viewer App

  1. Load a bag file containing geometry_msgs/Point or nav_msgs/Odometry message type.

  2. Select Time Plot Viewer from the toolstrip and choose the data source from the drop down to visualize how the numeric message field changes with respect to time.

  3. See the indicator to view the instantaneous location of the robot.

  4. Use the top-right corner options to zoom in and out, and pan in all directions.

Message Viewer

Message viewer Icon

Message Viewer of the ROS Bag Viewer App

  1. Load a bag file containing any message type.

  2. Select Message Viewer from the toolstrip and choose the data source from the drop down to visualize the raw message stored in the rosbag.

Map Viewer

Map Viewer Icon

Map Viewer of the ROS Bag Viewer App

  1. Load a bag file containing sensor_msgs/NavSatFix or gps_common/GPSFix message types.

  2. Select Map Viewer from the toolstrip and choose the data source from the drop down to visualize the GPS message.

  3. See the indicator to view the instantaneous location of the GPS coordinate in the trajectory.

  4. Use the top-right corner options to zoom in and out, and pan in all directions.

3D Viewer

3D Viewer Icon

3D Viewer of the ROS Bag Viewer App

  1. Load a bag file containing sensor_msgs/PointCloud2, sensor_msgs/LaserScan, visualization_msgs/Marker or visualization_msgs/MarkerArray message type.

  2. Select 3D viewer from the toolstrip to open the 3D Settings tab at the top-right edge of the app canvas.

  3. Select one or multiple topics from the table in the 3D Settings tab for overlaid 3D visualization.

  4. Specify the visualization color of the selected topics between these options from the dropdown:

    • Default — Message appears in the viewer in its default color, based on PARULA default colors and theme.

    • Flat Color — Opens color picker to choose from a set of Standard Colors and Custom Colors (RGB) options and overwrite the default color data stored in the message.

  5. Click Base Frame ID to choose the coordinate frame for rendering the scene. The camera position and orientation are relative to the origin of this frame.

    To render a scene, you must have a transform from its frame to the selected coordinate frame in the Base Frame ID parameter. If the scene's frame matches the Base Frame ID, you do not need to apply an additional transform.

    For more information on transform between coordinate frames for scene rendering, see the Transforms for Marker and 3D Visualization table.

  6. Use the top-right corner options in the viewer to zoom in and out, pan, and rotate the messages in 3-D.

Marker Viewer

Marker Viewer Icon

Marker Viewer of the ROS Bag Viewer App

  1. Load a bag file containing visualization_msgs/Marker or visualization_msgs/MarkerArray message types.

  2. Select Marker Viewer from the toolstrip and choose the data source from the drop down in the Visualizer Settings tab to visualize the marker message.

  3. Click Base Frame ID to specify the frame ID which you want to be the global frame for marker visualization.

    To render a marker, you must have a transform from its frame to the selected coordinate frame in the Base Frame ID parameter. If the scene's frame matches the Base Frame ID, you do not need to apply an additional transform.

    For more information on transform between coordinate frames for scene rendering, see the Transforms for Marker and 3D Visualization table.

  4. Use the top-right corner options to zoom in and out, pan, and rotate the message in 3-D.

  5. From the Tools section on the app toolstrip, you can:

    • Toggle the marker visualizer view between 2-D and 3-D axes.

    • Select two marker points and measure distance between them. Use the data tips option in the top-right corner to select the two points of interest.

The ROS Bag Viewer app enables you to visualize messages in ROS and ROS 2 bag files. You can create multiple viewers within the app and visualize different ROS and ROS 2 messages simultaneously. For each viewer, you can filter the supported messages in the bag file and press the Play button ROS Bag Viewer Play Button from the Playback panel for visualization.

Playback panel of ROS Bag Viewer

You can choose to display the Elapsed Time or the Timestamp values associated with the bag file along the slider tick labels. You can visualize the messages by putting a specific numeric value or drag the slider to a particular value of the elapsed time or the time stamp. You can also take a snapshot and export the information for further use.

Note

Upon loading a ROS or ROS 2 bag file, the app toolstrip updates with the added features of adding and managing bookmarks and tags, and exporting data from topics, bookmarks or search results.

Transforms for Marker and 3D Visualization

Number of TopicsFrame ConditionsTransformsOutput
One topicNo frameNo transform existsPlots topic in 3-D
More than one topicAll topics are on the same frameNo transform exists between any framePlots all topics in 3-D
More than one topicAll topics are on the different framesTransforms exist between all framesSelects first topic frame ID by default to plot all topics in 3-D
More than one topicAll topics are on the different framesNo transform exists between any frameOutputs error
More than one topicAll topics are on the different framesTransform exists only between two framesPlots the two topics with transform, in 3-D and outputs error for the rest
More than one topicNo frame ID exists for any topicNo transform exists between any frameConsiders all topics to be on the same frame and plots them in 3-D with a warning
More than one topicNo frame ID exists for one topic while all other topics are on the same frameNo transform exists between any framePlots the topics with frame ID, in 3-D and throws warning for the one with no frame ID
More than one topicNo frame ID exists for one topic while all other topics are on different framesTransforms exist between all topics with framesPlots the topics with frame ID, in 3-D and throws warning for the one with no frame ID
More than one topicNo frame ID exists for one topic while all other topics are on different framesNo transform exists between any frameOutputs error for the topic with no frame ID and plots the rest in 3-D with a warning

Add and Manage Bookmarks

During the bag file playback, you can add bookmarks at desired time points. To add a bookmark, follow these steps:

  1. Click Add in the Bookmark section of the app toolstrip. This opens the Add bookmark details dialog.

  2. Add the duration of the bookmark in seconds and specify a label. You can also tune the start time of the bookmark.

    Click OK. The app now adds a bookmark to the bag file starting from the start time for the specified duration.

You can always view all the bookmarks that you have added as a table by clicking Manage in the Bookmark section of the app toolstrip. Alternatively, you can also access the bookmark table by clicking the Bookmarks tab at the top-right edge of the app canvas. From the bookmark table, you can switch between different bookmarks, modify the bookmark parameters by double-clicking the entries, or delete bookmarks.

Add and Manage Tags

You can add tags to bag file that is currently open in the app. Tags serve as identifiers about the overall content in the bag file. Tags can also provide a quick understanding of the use-cases and applications of the bag file. To add a tag, follow these steps:

  1. Click Add Tag in the Tags section of the app toolstrip. This opens the Tags panel.

  2. Add the desired tag and press Enter.

Save and Restore Session

If you close the app with a bag file loaded or load a different bag file, this automatically saves the current session. The app saves these visualization session elements and restores them when you open the same bag file next time:

  • All visualizers

  • Visualizer layout

  • Bookmarks

  • Tags

Next Steps

Control ROS or ROS 2 Bag File Playback

See Also