Processor-In-The-Loop Execution from Command Line
Use the processor-in-the-loop (PIL) execution to check the numerical behavior of the CUDA® code that you generate from MATLAB® functions. A PIL simulation, which requires target connectivity, compiles generated source code, and then downloads and runs object code on NVIDIA® GPU platforms. The results of the PIL simulation are transferred to MATLAB to verify the numerical equivalence of the simulation and the code generation results.
The PIL verification process is a crucial part of the design cycle to check that the behavior of the generated code matches the design. PIL verification requires an Embedded Coder® license.
PIL Verification for Deployment on NVIDIA Jetson
This example shows how to verify the generated code by using the processor-in-the-loop (PIL) execution. In this example, the PIL execution uses an NVIDIA® Jetson AGX Xavier™ embedded platform.
Prerequisites
Target Board Requirements
NVIDIA Jetson Xavier embedded platform.
Ethernet crossover cable to connect the target board and host PC (if you cannot connect the target board to a local network).
NVIDIA CUDA® toolkit and libraries installed on the board.
Environment variables on the target for the compilers and libraries. For more information, see Install and Setup Prerequisites for NVIDIA Boards.
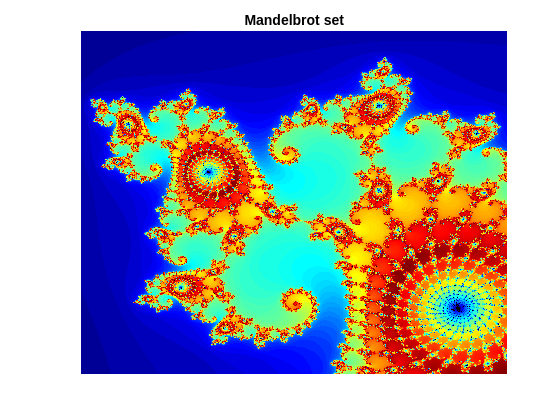
Mandelbrot Set
The Mandelbrot set is the region in the complex plane consisting of the values for which the trajectories defined by
remain bounded at . The overall geometry of the Mandelbrot set is shown in the figure. This view does not have the resolution to show the richly detailed structure of the fringe just outside the boundary of the set. At increasing magnifications, the Mandelbrot set exhibits an elaborate boundary that reveals progressively finer recursive detail.

Algorithm
The mandelbrot_count.m entry-point function contains a vectorized implementation of the Mandelbrot set based on the code provided in the e-book Experiments with MATLAB by Cleve Moler. The %#codegen directive turns on MATLAB® for code generation error checking. When GPU Coder™ encounters the coder.gpu.kernelfun pragma, it attempts to parallelize all the computation within this function, and then maps it to the GPU.
type mandelbrot_countfunction count = mandelbrot_count(maxIterations,xGrid,yGrid) %#codegen
% Copyright 2016-2024 The MathWorks, Inc.
z0 = complex(xGrid,yGrid);
count = ones(size(z0));
% Map computation to GPU.
coder.gpu.kernelfun;
z = z0;
for n = 0:maxIterations
z = z.*z + z0;
inside = abs(z)<=2;
count = count + inside;
end
count = log(count);
Test Script
Pick a set of limits that specify a highly zoomed part of the Mandelbrot set in the valley between the main cardioid and the bulb to its left. A 1000x1000 grid of and is created between these two limits. The Mandelbrot algorithm is then iterated at each grid location. An iteration number of 500 is enough to render the image in full resolution.
type mandelbrot_testmaxIterations = 500;
gridSize = 1000;
xlim = [-0.748766713922161, -0.748766707771757];
ylim = [ 0.123640844894862, 0.123640851045266];
x = linspace( xlim(1), xlim(2), gridSize );
y = linspace( ylim(1), ylim(2), gridSize );
[xGrid,yGrid] = meshgrid( x, y );
count = mandelbrot_count(maxIterations, xGrid, yGrid);
figure(1)
imagesc( x, y, count );
colormap([jet();flipud( jet() );0 0 0]);
axis off
title('Mandelbrot set');
To test the MATLAB entry-point function, run the script mandelbrot_test.
mandelbrot_test

Connect to NVIDIA Jetson Platform
The support package uses an SSH connection over TCP/IP to execute commands while building and running the generated CUDA code on the Jetson platforms. Connect the target platform to the same network as the host computer or use an Ethernet crossover cable to connect the board directly to the host computer. For information on how to set up and configure your board, see NVIDIA documentation.
Create Jetson Object
To communicate with the NVIDIA hardware, create a live hardware connection object by using the jetson function.
hwobj = jetson('jetson-nano-name','ubuntu','ubuntu');
When connecting to the target board for the first time,you must provide the host name or IP address, user name, and password of the target board. On subsequent connections, you do not need to supply the address, user name, and password. The hardware object reuses these settings from the most recent successful connection to an NVIDIA board.
By default, this example reuses the settings from the most recent successful connection to an NVIDIA Jetson AGX Xavier board.
hwobj = jetson;
Checking for CUDA availability on the Target...
Checking for 'nvcc' in the target system path...
Checking for cuDNN library availability on the Target...
Checking for TensorRT library availability on the Target...
Checking for prerequisite libraries is complete.
Gathering hardware details...
Checking for third-party library availability on the Target...
Gathering hardware details is complete.
 Board name              : NVIDIA Jetson AGX Xavier Developer Kit
 CUDA Version            : 11.4
 cuDNN Version           : 8.4
 TensorRT Version        : 8.4
 GStreamer Version       : 1.16.3
 V4L2 Version            : 1.18.0-2build1
 SDL Version             : 1.2
 OpenCV Version          : 4.5.4
 Available Webcams       : Logitech Webcam C925e
 Available GPUs          : Xavier
 Available Digital Pins  : 7  11  12  13  15  16  18  19  21  22  23  24  26  29  31  32  33  35  36  37  38  40
During the hardware live object creation, the support package performs hardware and software checks, installs MATLAB IO server on the target board, and gathers information on peripheral devices connected to the target. This information is displayed in the Command Window. In case of a connection failure, a diagnostics error message is reported at the MATLAB command line. If the connection has failed, the most likely cause is incorrect IP address or host name.
Configure the PIL Execution
Create a GPU code configuration object for generating a library and configure the object for PIL. Use the coder.hardware function to create a configuration object for the NVIDIA DRIVE or Jetson platform and assign it to the Hardware property of the code configuration object cfg. Use 'NVIDIA Jetson' for the Jetson boards and 'NVIDIA Drive' for the DRIVE boards.
cfg = coder.gpuConfig('lib','ecoder',true);
cfg.GpuConfig.CompilerFlags = '--fmad=false';
cfg.VerificationMode = 'PIL';
cfg.GenerateReport = true;
cfg.Hardware = coder.hardware('NVIDIA Jetson');
The --fmad=false flag when passed to nvcc, instructs the compiler to disable Floating-Point Multiply-Add (FMAD) optimization. This option is set to prevent numerical mismatch in the generated code because of architectural differences in the CPU and the GPU.
Generate Code and Run PIL Execution
To generate CUDA library and the PIL interface, use the codegen command and pass the GPU code configuration object along with the size of the inputs for the mandelbrot_count entry-point function. The -test option runs the MATLAB test file, mandelbrot_test. The test file uses mandelbrot_count_pil, the generated PIL interface for mandelbrot_count.
inputs = {0,zeros(1000),zeros(1000)};
codegen -config cfg -args inputs mandelbrot_count -test mandelbrot_test
### Connectivity configuration for function 'mandelbrot_count': 'NVIDIA Jetson'
PIL execution is using Port 17725.
PIL execution is using 30 Sec(s) for receive time-out.
Code generation successful: View report
Running test file: 'mandelbrot_test' with MEX function 'mandelbrot_count_pil.mexa64'.
### Starting application: 'codegen/lib/mandelbrot_count/pil/mandelbrot_count.elf'
To terminate execution: clear mandelbrot_count_pil
### Launching application mandelbrot_count.elf...
The software creates the following output folders:
codegen\lib\mandelbrot_count— Standalone code formandelbrot_count.codegen\lib\mandelbrot_count\pil— PIL interface code formandelbrot_count.
Observe that the output of this run matches the output from the original mandelbrot_count.m function.
Usage Notes for Windows® platform
Usage notes for PIL execution on a Windows platform:
On a Microsoft® Windows® system, the Windows Firewall can potentially block a PIL execution. Change the Windows Firewall settings to allow access.
Suppose that the MATLAB current working directory (the folder that
pwddisplays) is a UNC path (for example,\\server\a\b\c) on a Windows platform. If you launch a SIL executable from this path, the location where the SIL executable is launched can be unpredictable and different from the MATLAB current working directory (for example,C:\Windows). To fix this issue, use a mapped network drive for the UNC path as your MATLAB current working directory.
Terminate the PIL Execution Process.
Terminate the PIL execution process.
clear mandelbrot_count_pil;Runtime log on Target: [sudo] password for ubuntu: PIL execution terminated on target.
You can also use the command clear mex, which clears MEX functions from memory.
Limitations
When using PIL execution, make sure that the
Benchmarkingoption in GPU Coder™ settings isfalse. Executing PIL with benchmarking results in compilation errors.GPU Coder does not support collecting code coverage metrics during software-in-the-loop (SIL) and processor-in-the-loop (PIL) simulations.
See Also
Functions
jetson|drive|webcam|getPILPort|getPILTimeout|setPILPort|setPILTimeout
Objects
Related Examples
- Sobel Edge Detection on NVIDIA Jetson Nano Using Raspberry Pi Camera Module V2
- Processor-in-the-Loop Execution on NVIDIA Targets Using GPU Coder
More About
You can also select a web site from the following list:
Americas
- América Latina (Español)
- Canada (English)
- United States (English)
Europe
- Belgium (English)
- Denmark (English)
- Deutschland (Deutsch)
- España (Español)
- Finland (English)
- France (Français)
- Ireland (English)
- Italia (Italiano)
- Luxembourg (English)
- Netherlands (English)
- Norway (English)
- Österreich (Deutsch)
- Portugal (English)
- Sweden (English)
- Switzerland
- United Kingdom (English)