Configure Gigabit Ethernet Network Adapter on Windows
The following Ethernet adapter configuration settings are a best practice for proper operation and optimum performance when acquiring images from a GigE Vision® camera.
Note
Before you configure the Ethernet adapter settings, make sure you have the recommended hardware setup described in GigE Vision Image Acquisition Quick Start Guide.
Gigabit Ethernet Adapter Driver
Verify that an appropriate Ethernet network adapter driver (provided by the network adapter manufacturer) is installed and working properly.
Note
Custom high-performance drivers installed for use with a third-party imaging
application do not work with the Image Acquisition Toolbox™
videoinput and gigecam interfaces.
To verify the Gigabit Ethernet adapter driver:
Open Windows Device Manager, and click Network adapters.
Under Network adapters, right-click the Gigabit Ethernet adapter entry dedicated to the camera network connection and click Properties in the context menu.
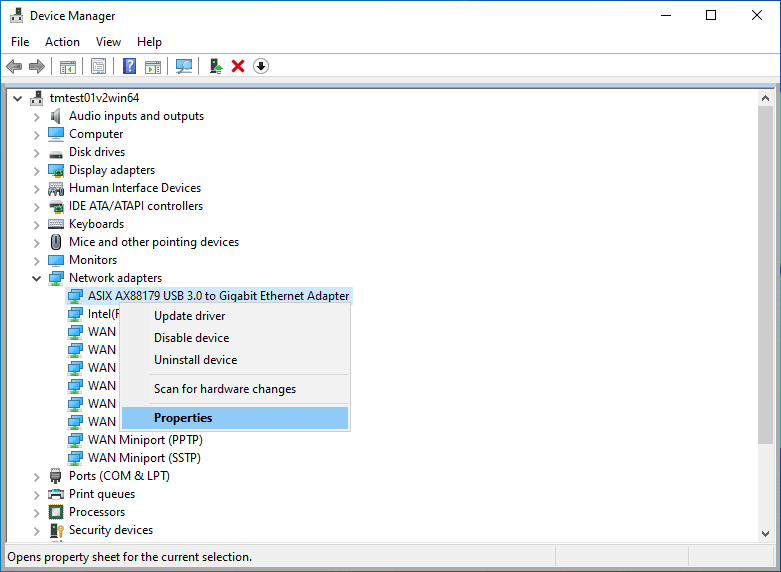
In the Adapter Properties dialog box, click the Driver tab to verify the driver.

Gigabit Adapter Settings
You can use certain settings for optimum GigE Vision streaming performance, including reduced CPU load and smaller likelihood of dropped frames. Use the following settings for the Gigabit Ethernet adapter jumbo packet and receive buffers for the best performance.
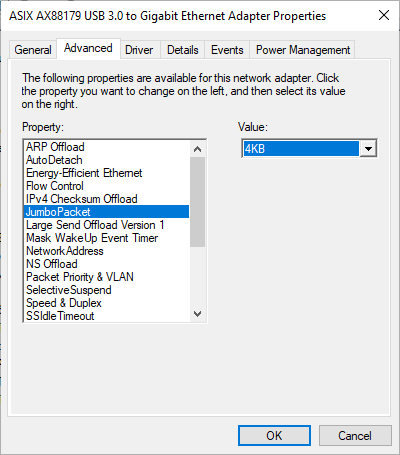
In the network Adapter Properties, click the Advanced tab.
Set Jumbo Frame (or Jumbo Packet) to the maximum supported value, for example, 9014 bytes. Gigabit Ethernet controllers that support jumbo frames can transfer packet sizes larger than the standard Ethernet frame size (1500 bytes).
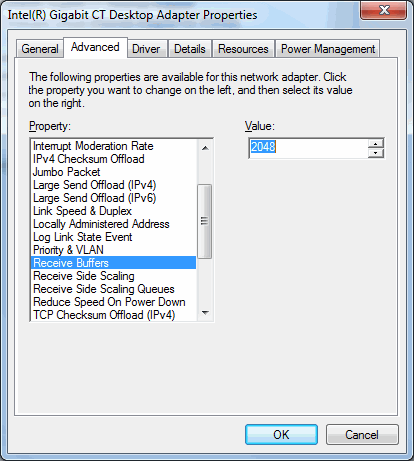
Set Receive Buffers (or Receive Descriptors) to the maximum supported value, for example, 2048. For some Ethernet controller drivers, this setting is grouped under Performance Options.
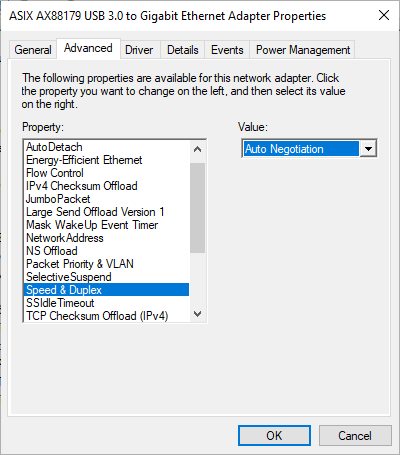
Confirm that Link Speed & Duplex is set to Auto Negotiation (or Auto Detect).
Network Settings for the Camera Network Connection
Use the following settings for the dedicated network connection of the camera to achieve proper operation and optimum performance when acquiring images from a GigE Vision camera.
In Windows Control Panel, open the Network and Sharing Center.
Click on Change adapter settings.

Right-click the network connection of the camera, and click Properties.
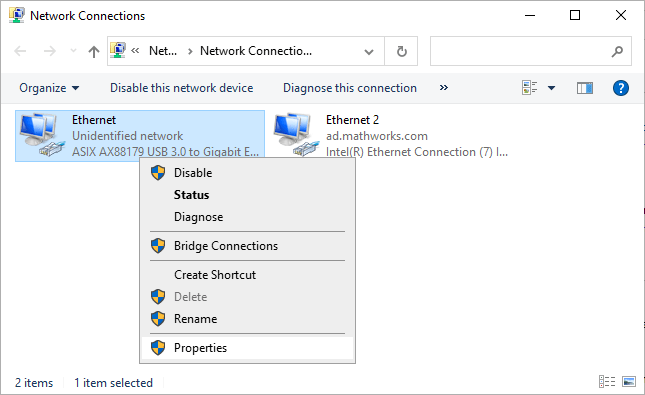
In the Networking tab, confirm that Internet Protocol Version 4 (TCP/IPv4) is checked, and uncheck all other options.
When a dedicated camera network connection is used, other protocols, clients, or services can be unchecked, because they are not necessary for GigE Vision control and streaming.
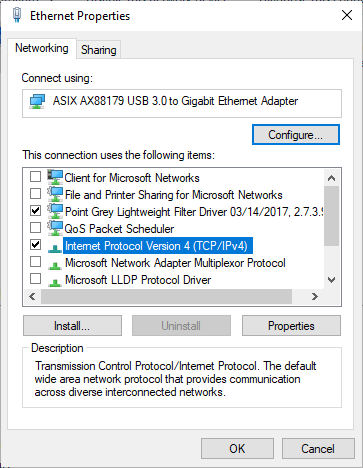
Make sure that any vendor drivers are unchecked and that anti-virus program drivers are unchecked. If you cannot uncheck the anti-virus software from the adaptor due to organization restrictions, you may need to purchase a second gigabit Ethernet card. In this case, leave all of the options as is for the network card for your PC, and configure the second card as described here, which will only connect to your camera.
To configure the IP address, select Internet Protocol Version 4 (TCP/IPv4) and right-click Properties.
To configure automatic IP address assignment for the camera network connection, on the General tab, select Obtain an IP address automatically and Obtain DNS server address automatically, and click OK.

If you have multiple cameras connected to multiple Ethernet cards, you cannot have them all set to automatic IP configuration. You must specify the IP address for each card and each card must be on a different subnet.