Onboard Computer Path Planning Interface for PX4 SITL Deployable on NVIDIA Jetson
This example demonstrates enabling and interfacing onboard computer path planning with PX4® Software-in-the-Loop (SITL).
Note: This example uses NVIDIA® Jetson™ as the onboard computer.
In this example you:
Enable onboard computer workflows with PX4 SITL.
Implement a PX4 path planning interface in Simulink® and deploy on NVIDIA Jetson.
Establish MAVLink communication between the onboard computer and PX4 SITL.
Run and complete a UAV mission with onboard computer assisted path planning.
The following diagram illustrates high level interface between multiple components used in this example.
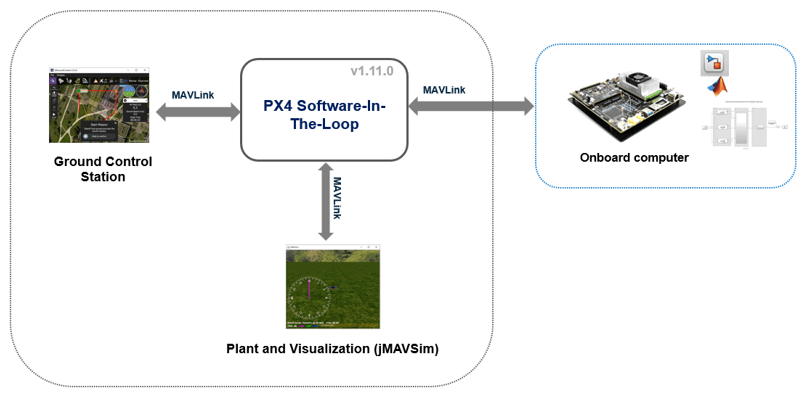
QGroundControl (QGC) is the ground control station software, which helps you to configure PX4 autopilot software. In this example, you use QGC to create, upload, and monitor a UAV mission. When PX4 SITL is in mission mode, it sends the mission waypoints to the onboard computer (NVIDIA Jetson), which is connected to the same network over MAVLink using PX4 path planning interface. The onboard computer uses the Waypoint Follower (UAV Toolbox) block from UAV Toolbox to generate trajectory to follow these waypoints. The updated trajectory waypoints output from the Waypoint Follower block are sent back to the PX4 SITL over MAVLink using the PX4 path planning interface.
Prerequisites
If you are new to Simulink, watch the Simulink Quick Start video.
If you are new to PX4, refer to PX4 Autopilot User Guide to understand the PX4 flight stack for UAVs.
This example uses:
MATLAB®
Simulink
UAV Toolbox
MATLAB Coder Support Package for NVIDIA Jetson and NVIDIA DRIVE Platforms
This example requires the following third-party software:
PX4 flight stack for UAVs
Cygwin™ Toolchain (For Windows® Operating System)
Install Required Applications
PX4 Source Code
For this example, use PX4 Autopilot Firmware v1.11.0.
Download PX4 Source Code from GitHub® (for Ubuntu®)
1. Open the bash terminal on Ubuntu 18.04.
2. Create a directory mypx4 in the home folder.
3. Go to the newly created px4 directory, and run the following commands one-by-one. Wait for each command to execute before entering the next command.
git clone https://github.com/PX4/Firmware.git Firmware
cd Firmware
git checkout v1.11.0
git submodule update --init --recursive
4. Install the auxiliary packages required by running the ubuntu.sh script. Enter the following command (while in the Firmware folder) in the terminal.
bash ./Tools/setup/ubuntu.sh
5. Restart the computer or log off and log in again after the previous process is complete.
Download PX4 Source Code from GitHub (for Windows)
1. The Cygwin toolchain is required to build the PX4 Firmware in Windows. Download version 0.8 of the PX4 Cygwin Toolchain MSI Installer, compatible with PX4 Firmware v1.11.0, available here.
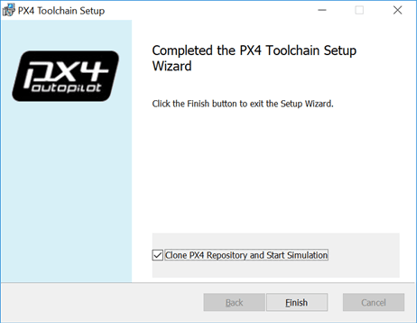
2. Install the PX4 Cygwin Toolchain MSI Installer. At the last step of the PX4 Toolchain Setup wizard. select the option Clone PX4 repository and Start Simulation, and then click Finish. Doing so clones the latest PX4 Firmware.
3. Wait for the firmware to finish cloning. After the firmware is cloned, Simulation starts in jMAVSim. Close the bash shell at this stage.
4. The PX4 firmware is cloned inside a folder named home, inside the Cygwin folder that you selected during installation, for example, C:\px4_cygwin\home\.
5. Navigate to the installed Cygwin Toolchain directory on your PC. For example, C:\px4_cygwin.
6. Launch the batch file run-console.bat. Doing so opens the Cygwin console.
7. From the Cygwin console, navigate to the PX4 directory.
cd home
8. Go to the newly created PX4 directory, and run the following commands. Wait for each command to execute before entering the next command.
cd Firmware
git checkout v1.11.0
git submodule update --init --recursive
QGroundControl
QGC provides full flight control and vehicle setup for PX4 powered vehicles. For QGC installation instructions, see Download and Install QGC. This example uses QGC v3.5.6.
Step 1: Configure and Run the Model
To get started, follow these steps:
1. Open the example model by executing this command at the MATLAB command prompt.
open_system('OnboardComputer_PathPlanning_PX4_SITL_NVIDIA_Jetson')
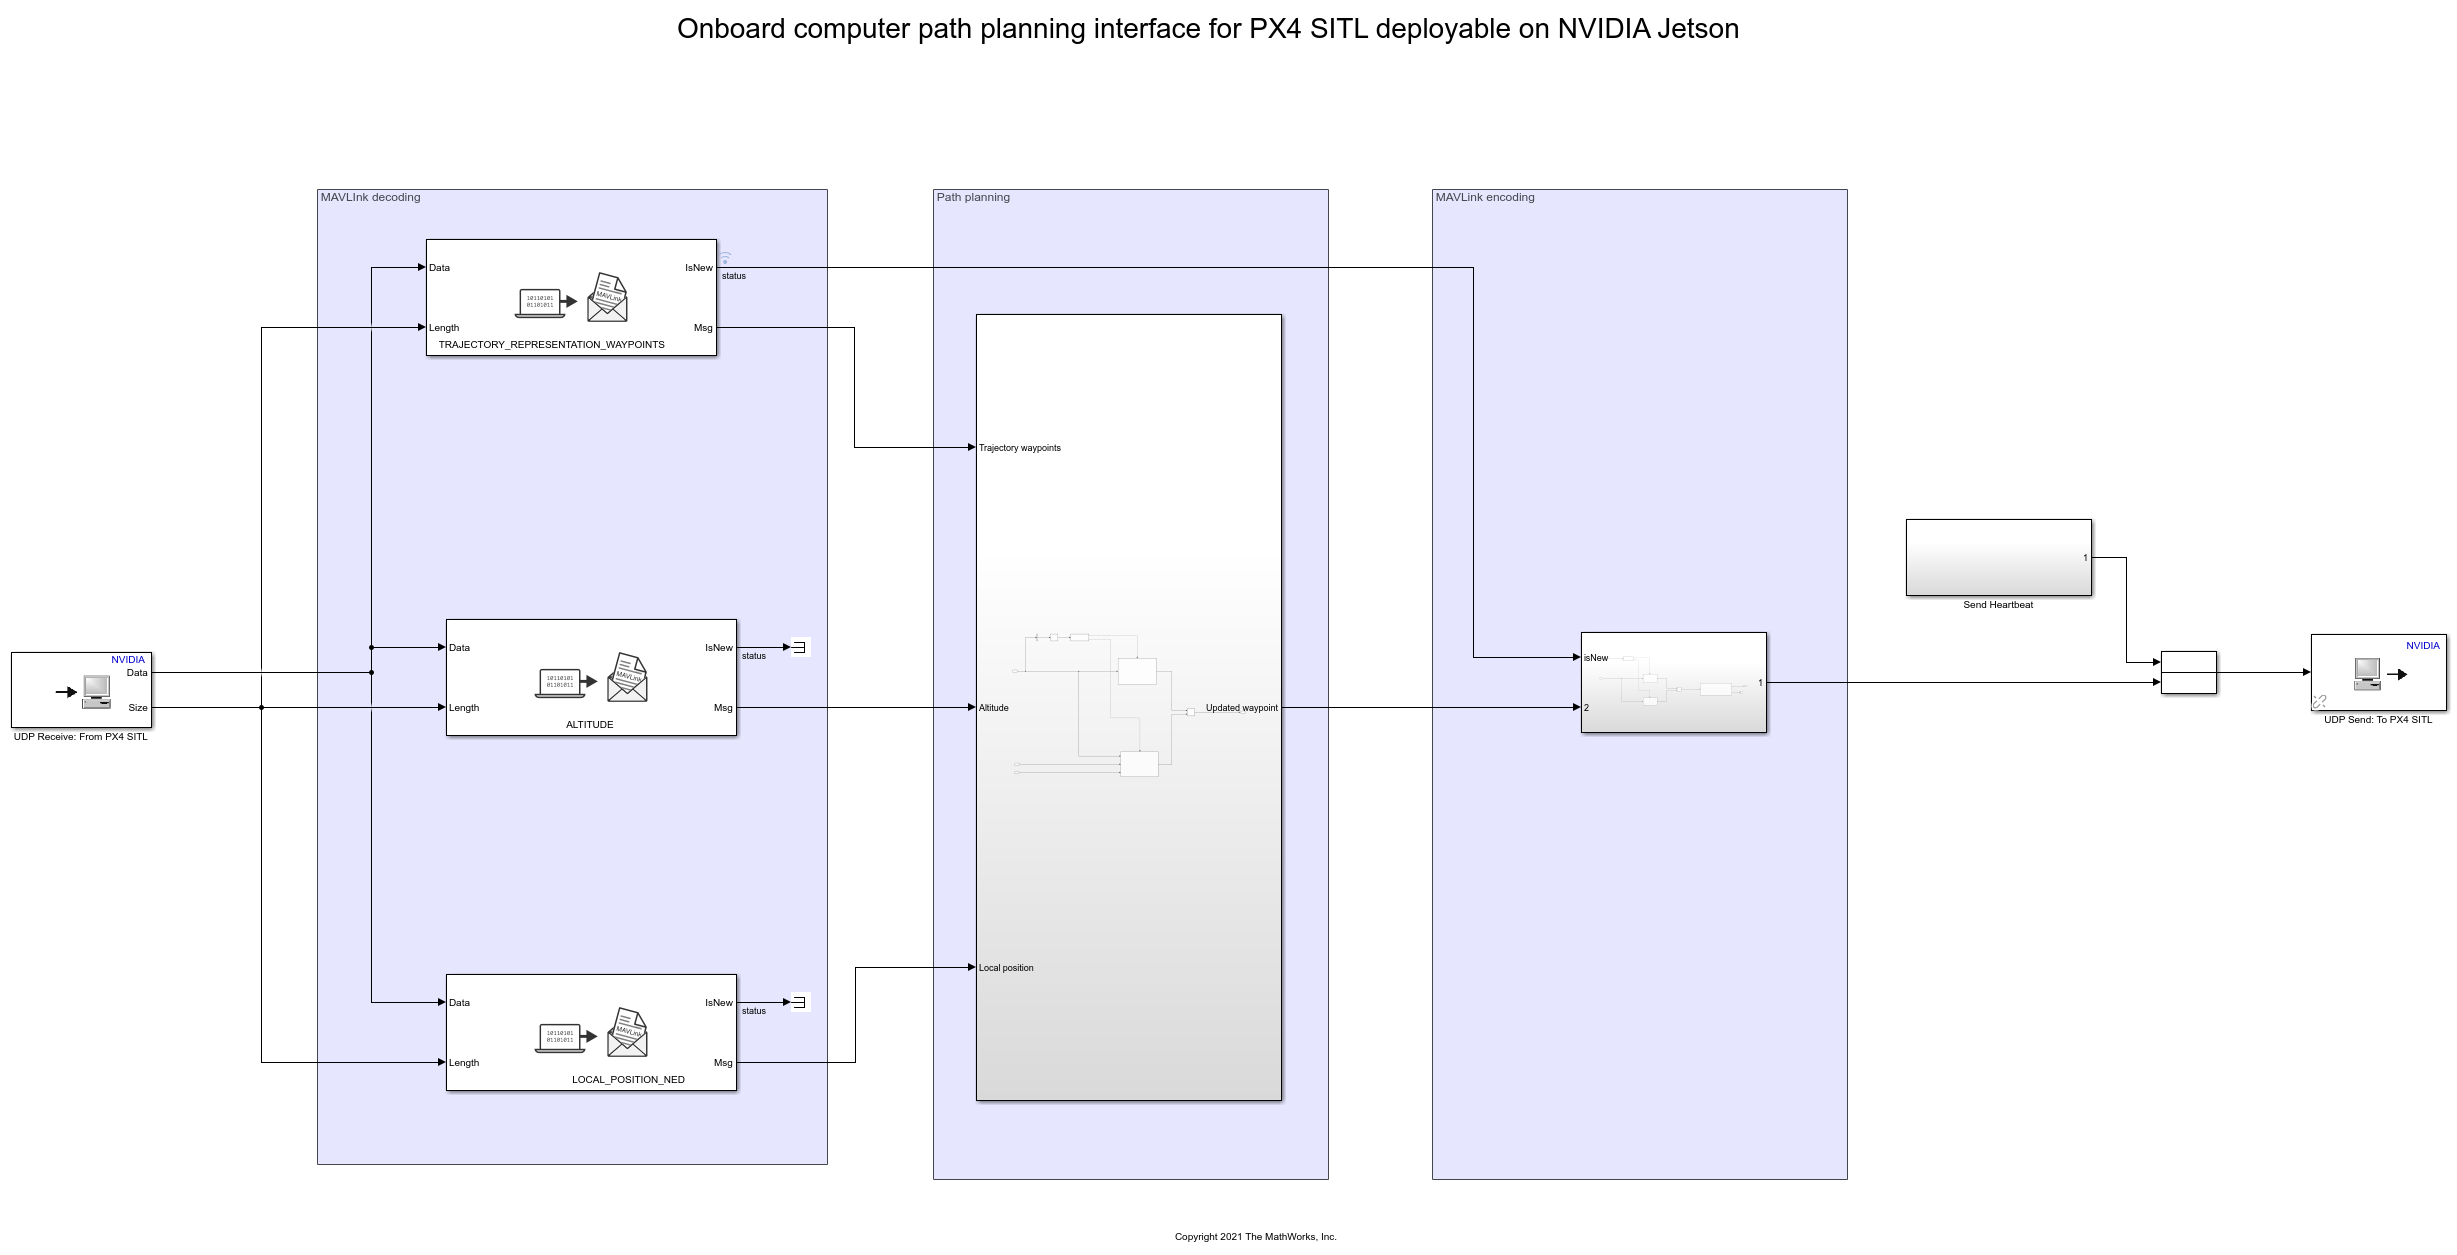
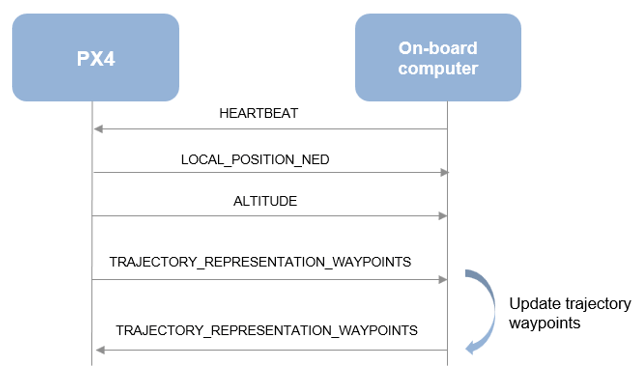
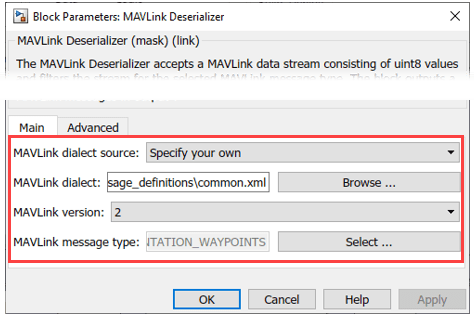
This model implements the PX4 path planning interface using MAVLink Serializer (UAV Toolbox) and MAVLink Deserializer (UAV Toolbox) blocks. Refer to PX4 Path Planning Interface for more details. The MAVLink messages that are exchanged as part of this interface are shown in the following diagram.
2. In Target hardware resource > Board Parameters, enter the IP address of the NVIDIA Jetson and your login credentials.

3. Find the IP address of the NVIDIA Jetson board connected. Ensure that the NVIDIA Jetson is connected to the same network as your host PC. In the MATLAB Command Window, run the exampleHelperUpdateStartupScriptforOBC script, attached to this example. The first input is the path to the PX4 source downloaded and second input is the IP address of the NVIDIA Jetson board. This script modifies the startup script of PX4 SITL to enable MAVLink connectivity to NVIDIA Jetson.
exampleHelperUpdateStartupScriptforOBC('C:\px4_cygwin\home\','172.19.XX.XX');
4. Update the MAVLink Dialect path of the MAVLink Serializer and MAVLink Deserializer blocks in the example to the MAVLink Dialect location in the PX4 source downloaded. A script is provided with the example to automate this. Run the script exampleHelperUpdateMAVLinkDialectPath, attached to this example to update the MAVLink Dialect path in the model. Input is the path to PX4 source downloaded.
exampleHelperUpdateMAVLinkDialectPath('C:\px4_cygwin\home\');
Note: The script provided with this example is specific to this example. If you are adding MAVLink Serializer and Deserializer blocks to this model or creating a new model, this script does not work. You can either update the script or update the block mask manually.
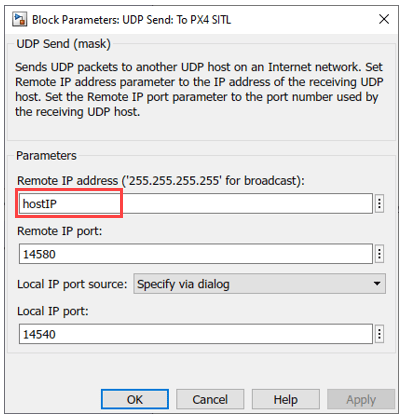
5. Open the block mask of the UDP Send block in the model. In the Remote IP address field, enter IP address of the host PC on which you are running PX4 SITL. You can also achieve this by defining a variable hostIP in the workspace. Ensure that the host PC and NVIDIA Jetson are connected to same network.
hostIP ='172.19.XX.XX';
6. Run the example model in External mode by selecting the Hardware tab and then clicking Monitor & Tune. Ensure that the simulation is started.
Note: If you get "Build failed because the build file name(s) exceed the Windows limit of 260 characters. Build from a working directory with a shorter path." error, change the path to a different working directory and then run the example model in External mode.
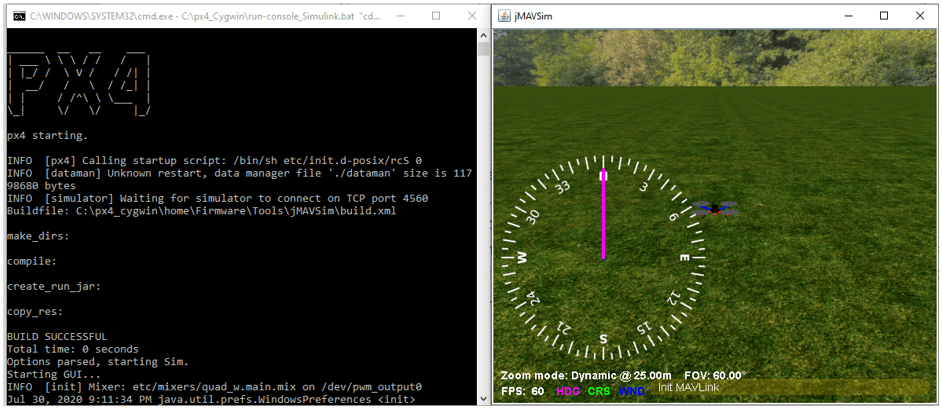
Step 2: Launch PX4 SITL
Launch PX4 SITL with jMAVSim as the Flight Simulator.
On Windows, in Cygwin Console navigate to the PX4 directory and execute these commands:
On Ubuntu, navigate to the PX4 directory in terminal and run these commands:
cd Firmware
make px4_sitl jmavsim
PX4 SITL and jMAVSim launch.
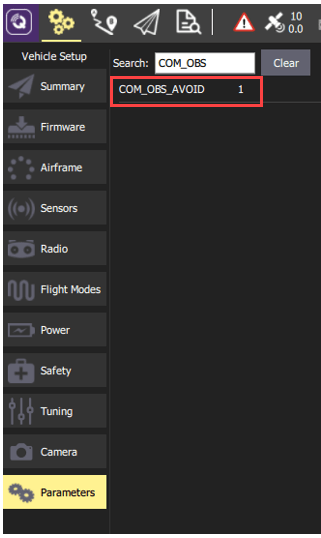
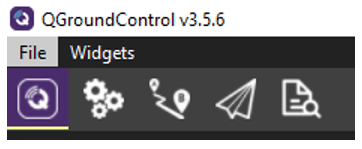
Step 3: Open QGC and Enable PX4 Path Planning Interface
1. Launch the QGC Application and wait till it connects to the PX4 SITL.
2. Set the PX4 parameter COM_OBS_AVOID to enable the PX4 path planning interface. Navigate to Parameters from the main menu and set the COM_OBS_AVOID parameter value to 1.
Step 4: Create, Upload, and Start Mission from QGC
You can create a mission or use the preplanned mission, example_mission.plan, which is available with this example. Perform these steps:
1. Launch the QGC and navigate to the Plan View. For information on Plan View, see the QGC Plan View documentation.
2. Create a mission or upload the preplanned mission, example_mission.plan.
Create a mission: For information on creating a mission, see the QCG Plan View documentation.
To upload the preplanned mission, click Open Model at the top of this page and download the plan file (
example_mission.plan) to your computer. In the QGC, navigate and selectexample_mission.planfile.
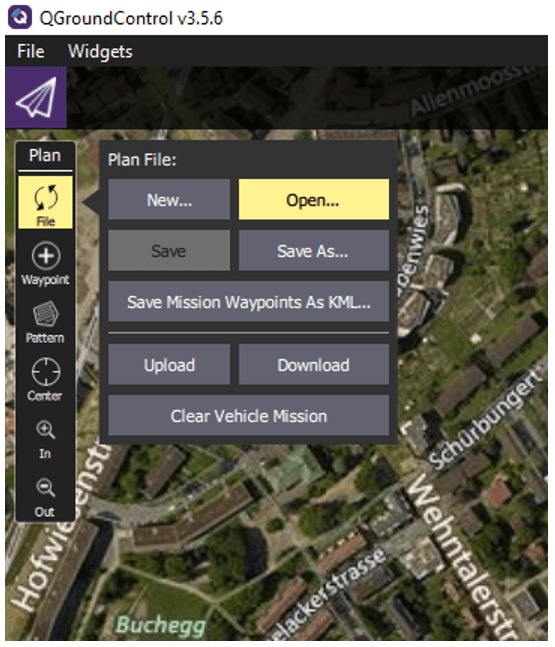
After you upload the plan, the mission is visible in QGC.
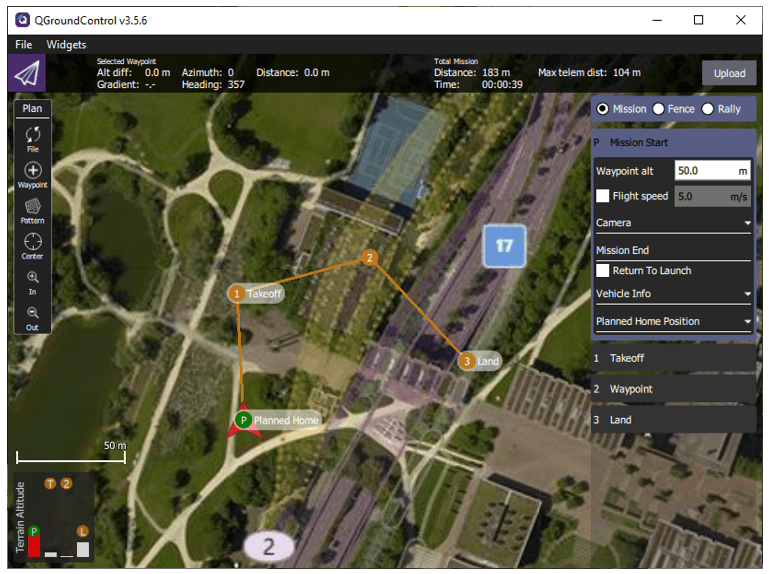
3. Click Upload in the QGC interface to upload the mission from QGroundControl.
4. Move to Fly View to see the uploaded mission. For information on Fly View, see the QGC Fly View documentation.
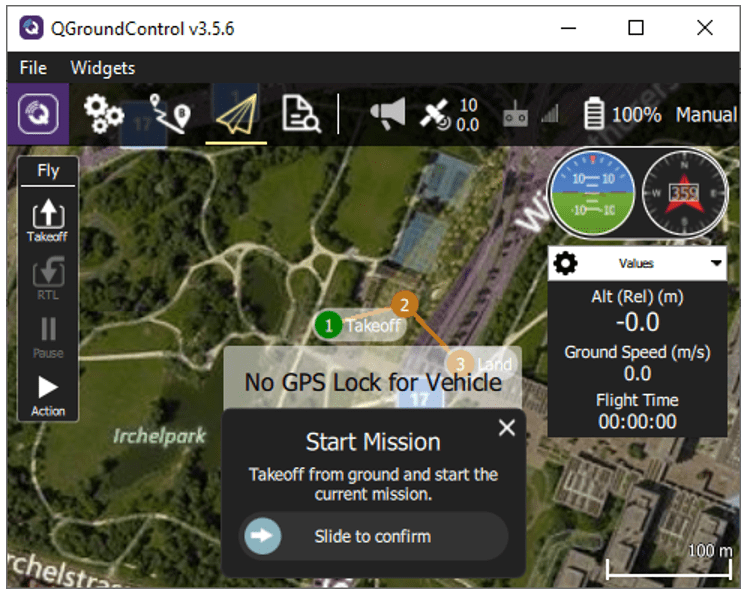
5. Ensure that GPS fusion is completed and the GPS location is updated in QGC.

6. Start the mission from QGC
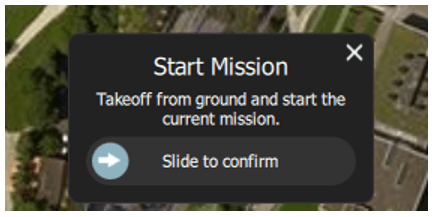
The drone takes off after the mission starts.


Observations After PX4 Autopilot Takes Off
In this example, the drone follows the mission. Through PX4 path planning interface, updated waypoints are sent to the onboard computer. On the onboard computer, Waypoint Follower block from UAV Toolbox is used to generate trajectory from these waypoints. For more information, see Waypoint Follower (UAV Toolbox). The generated trajectory is sent back to the PX4 SITL as a series of waypoints, one at a time.
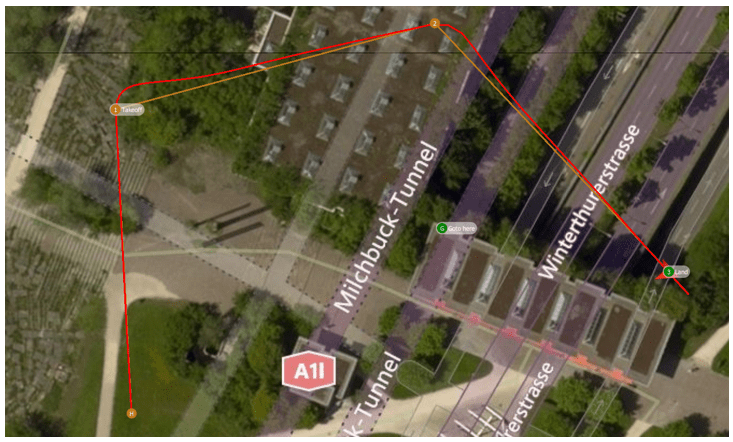
Once the mission is complete, you can compare the planned path (yellow) and actual path (red) followed by the UAV.
Troubleshooting
Description: The PX4 SITL is frozen a few minutes after the launch in Windows. QGC displays the error message "Communication Lost". This issue occurs when PX4 SITL is frozen and connectivity with QGC is lost a few minutes after launch.

Action
Shut down PX4 SITL by entering shutdown command in PX4 SITL window.
Restart PX4 SITL using the
make px4_sitl jmavsimcommand.
Continue with starting the mission once GPS fusion is achieved.
Description: "Obstacle Avoidance system failed, loitering" warning when starting a mission.

This warning occurs because the communication between NVIDIA Jetson and PX4 SITL is not established.
Action: Ensure that host PC and NVIDIA Jetson are connected to same network. Try pinging NVIDIA jetson from the host PC and vice versa.
Description: "Connection to mission computer lost" warning during a mission. This warning occurs because the onboard computer is not accessible from PX4 SITL.

Action: Ensure that the monitor and tune simulation is running. If the simulation is stopped, run the model in external mode again.
You can also select a web site from the following list
Americas
- América Latina (Español)
- Canada (English)
- United States (English)
Europe
- Belgium (English)
- Denmark (English)
- Deutschland (Deutsch)
- España (Español)
- Finland (English)
- France (Français)
- Ireland (English)
- Italia (Italiano)
- Luxembourg (English)
- Netherlands (English)
- Norway (English)
- Österreich (Deutsch)
- Portugal (English)
- Sweden (English)
- Switzerland
- United Kingdom (English)
Asia Pacific
- Australia (English)
- India (English)
- New Zealand (English)
- 中国
- 日本Japanese (日本語)
- 한국Korean (한국어)