MySQL ODBC for Windows
This tutorial shows how to set up a data source and connect to a MySQL® database using the Database Explorer app or the command line. The tutorial uses a MySQL ODBC 5.3 Driver to connect to the MySQL database.
Step 1. Verify the driver installation.
The ODBC driver is typically preinstalled on your computer. For details about the driver installation or troubleshooting the installation, contact your database administrator or refer to your database documentation on ODBC drivers. For information about the Microsoft® ODBC Data Source Administrator, see Driver Installation.
Note:
Database Toolbox™ no longer supports connecting to a database using a 32-bit driver. Use the 64-bit version of MySQL. If you have issues working with the ODBC driver, use the JDBC driver instead. For details, see MySQL JDBC for Windows. For details about working with the 64-bit version of Windows®, see Using Previous MATLAB Releases.
Step 2. Set up the data source using the Database Explorer app.
The Database Explorer app accesses the Microsoft ODBC Data Source Administrator automatically when you configure an ODBC data source. Alternatively, you can access the Microsoft ODBC Data Source Administrator using the configureODBCDataSource function.
Open the Database Explorer app by clicking the Apps tab on the MATLAB® Toolstrip. Then, on the right of the Apps section, click the Show more arrow to open the apps gallery. Under Database Connectivity and Reporting, click Database Explorer. Alternatively, enter
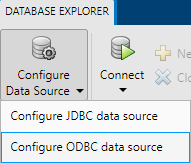
databaseExplorerat the command line.In the Data Source section, select Configure Data Source > ODBC.
In the ODBC Data Source Administrator dialog box, you define the ODBC data source.
Tip
When setting up an ODBC data source, you can specify a user data source name (DSN) or a system DSN. A user DSN is specific to the person logged into a machine. Only this person sees the data sources that are defined on the user DSN tab. A system DSN is not specific to the person logged into a machine. Any person who logs into the machine can see the data sources that are defined on the system DSN tab. Your ability to set up a user DSN or system DSN depends on the database and ODBC driver you are using. For details, contact the database administrator or refer to the ODBC driver documentation.
Click the System DSN tab, and then click Add.
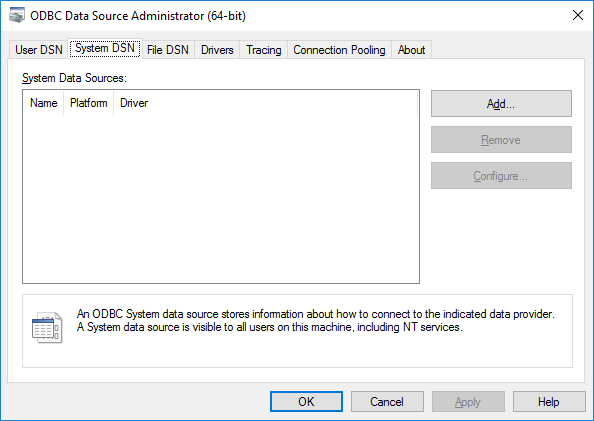
The Create New Data Source dialog box opens and displays a list of installed ODBC drivers.
Select the ODBC driver
MySQL ODBC 5.2a Driver.Note
The name of the ODBC driver can vary.
Click Finish.
In the MySQL Connector/ODBC Data Source Configuration dialog box, fill out the boxes.

In the Data Source Name box, enter an appropriate name for the data source, such as
MySQL. You use this name to establish a connection to your database.In the Description box, enter a description for this data source, such as
MySQL database.In the TCP/IP Server box, enter the name of your database server. Consult your database administrator for the name of your database server.
In the Port box, enter the port number. The default port number is
3306.In the User box, enter your username.
In the Password box, enter your password.
In the Database box, enter the name of your database.
Click Test to test the connection to your database. If your computer successfully connects to the database, the Test Result dialog box opens and displays a message indicating the connection is successful.
Click OK in the MySQL Connector/ODBC Data Source Configuration dialog box. The ODBC Data Source Administrator dialog box shows the ODBC data source
MySQL.After you complete the data source setup, connect to the MySQL database using the Database Explorer app or the command line with the native ODBC connection.
Step 3. Connect using the Database Explorer app or the command line.
Connect to MySQL Using Database Explorer App
On the Database Explorer tab, in the Connections section, click Connect and select the data source for the connection.
In the connection dialog box, enter your username and password, or leave these boxes blank if your database does not require them. Click Connect.
The Catalog and Schema dialog box opens.
In the Catalog list, select the catalog. Click OK.
The app connects to the database and displays its tables in the Data Browser pane. A data source tab appears to the right of the pane. The title of the data source tab is the data source name that you defined during the setup. The data source tab contains empty SQL Query and Data Preview panes.
Select tables in the Data Browser pane to query the database.
Close the data source tab to close the SQL query. In the Connections section, close the database connection by clicking Close Connection.
Note
If multiple connections are open, close the database connection of your choice by selecting the corresponding data source from the Close Connection list.
Connect to MySQL Using ODBC Driver and Command Line
Connect to the database with the ODBC data source name. For example, this code assumes that you are connecting to a data source named
MySQL.When a database requires authentication, the recommended practice is to store credentials in your MATLAB vault using
setSecretinstead of including them in your code. Retrieve your credentials by using thegetSecretfunction.Before R2024a:
setSecretandgetSecretare not available. Specify your username and password using character vectors or strings.setSecret("usernamemysql"); setSecret("passwordmysql"); conn = database('MySQL',getSecret("usernamemysql"),getSecret("passwordmysql");
Close the database connection.
close(conn)